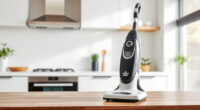
Unboxing a new Dyson V15 Detect™ Origin cordless vacuum is exciting, but setting it up properly ensures optimal performance and longevity. This guide walks you through the complete setup process, from initial assembly to maintenance tips, so you can start cleaning your home effectively right away.

Get cleaning gear delivered free with Prime
- Fast, free delivery on millions of items
- Prime Video, Amazon Music and more included
- Member-only deals all year
We’ll cover everything you need to know, including attaching accessories, configuring settings, and troubleshooting common issues. Whether you’re a first-time Dyson user or upgrading your current vacuum, these steps will help you maximize your vacuum’s capabilities safely and efficiently.
Key Takeaways
| Powerful cleaning | The Dyson V15 Detect™ offers 100% more power and intelligent debris detection. |
| Smart features | LCD screen displays particle count, runtime, and maintenance alerts. |
| Accessory versatility | Includes advanced cleaner heads and a crevice tool for various surfaces. |
| Ease of setup | Simple assembly steps ensure quick and safe installation. |
| Maintenance tips | Regular filter cleaning and filter replacements keep your vacuum performing at its best. |
Unboxing and Initial Inspection
- Carefully open the Dyson V15 Detect™ Origin box and remove all components. Ensure you have the main vacuum body, cleaner heads, crevice tool, and charger included.
- Check each part against the included packing list to confirm nothing is missing or damaged during transit.
- Inspect the vacuum and accessories for any visible damage. If you notice any issues, contact Dyson customer service before proceeding.
Attaching the Cleaner Head and Accessories
Start by attaching the cleaner head to the main body of the vacuum. Align the connector with the slot on the vacuum and push until it clicks into place. For different cleaning tasks, you can swap between the Digital Motorbar or Fluffy Optic cleaner heads.
To attach the crevice tool, slide it onto the wand or directly onto the main body when needed for tight spaces or corners. The crevice tool from the recommended accessory pack offers enhanced reach for hard-to-access areas.
Charging and Powering Up
- Connect the charger to a power outlet and plug it into the vacuum’s charging port located on the main body.
- Charge the vacuum fully before first use for about 4 hours to ensure maximum runtime.
- Once charged, the LCD screen will display the remaining runtime and mode settings.
Tip: Always use the original Dyson charger to prevent damage and ensure safety.
Configuring Settings and Using the LCD Screen
Power on the vacuum by pulling the trigger. The LCD screen will display real-time data, including particle count, power mode, and battery status.
Adjust power modes using the button on the vacuum or via the LCD. The vacuum intelligently adapts power based on debris detected, optimizing battery life.
Regularly check the LCD for maintenance alerts or updates to ensure your vacuum continues to operate smoothly.
Routine Maintenance and Troubleshooting
- Clean the filters regularly by rinsing the pre-filters or replacing them with the recommended 3-pack filters when needed.
- Check for blockages or debris in the cleaner heads and crevice tools.
- If the vacuum isn’t powering on or the runtime is shorter, verify the battery connection and ensure proper assembly.
- Refer to the LCD for error messages and follow the prompts for troubleshooting.
Helpful Tips for Optimal Performance
Keep your vacuum filters clean for maximum suction. Use the crevice tool for detailed cleaning in tight spots, and switch cleaner heads based on your floor type for best results. Regularly update and replace filters as recommended, and store the vacuum in a dry place when not in use.
Always turn off and disconnect the charger before cleaning or servicing your vacuum to avoid accidents. Proper maintenance prolongs your vacuum’s lifespan and maintains peak cleaning power.
The Products in This Guide

Dyson V15 Detect™ Origin Cordless Vacuum
- ✔ Weight: 6.8 lbs
- ✔ Runtime: 60 minutes
- ✔ Charging Time: 4 hours

LANMU Crevice Tool Vacuum Attachments Compatible
- ✔ Length: 15 inches
- ✔ Compatibility: Multiple Dyson models
- ✔ Material: Plastic
Dyson V15 Detect™ Origin Cordless Vacuum
The Dyson V15 Detect™ Origin offers advanced features like laser dust detection, an LCD screen, and powerful suction, making it ideal for deep cleaning across all floor types. Proper setup ensures you get the most out of this high-performance cordless vacuum.
Pros:
- Powerful suction with 100% more power
- Intelligent debris detection
- Long battery life (60 minutes)
- Includes versatile cleaner heads
Cons:
- Initial setup may require careful assembly
- Filter cleaning is necessary for optimal performance
- Price point may be high for some users
Best for: Deep cleaning homes with pets, hard floors, and carpets
Not ideal for: For users seeking a budget-friendly or corded vacuum alternative
Bottom line: A high-powered, intelligent cordless vacuum perfect for comprehensive home cleaning.
LANMU Crevice Tool Vacuum Attachments Compatible
The LANMU Crevice Tool Vacuum Attachments are a versatile addition that helps reach into small crevices and corners, making your Dyson V15 even more effective for detailed cleaning tasks.
Pros:
- Narrow nozzle for tight spots
- Compatible with multiple Dyson models
- Flexible and slim design
- Easy to attach and use
Cons:
- May be too narrow for larger debris
- Requires manual handling for best results
- Not suitable for heavy-duty cleaning
Best for: Cleaning corners, baseboards, and car interiors
Not ideal for: For general cleaning or large debris pickup
Bottom line: A practical accessory for precision cleaning in tight spaces.
Frequently Asked Questions
How do I maximize battery life on my Dyson V15 Detect™?
Use the power trigger only when needed, select the appropriate power mode, and ensure the battery is fully charged before use. Regularly check the LCD for remaining runtime and maintenance alerts.
How often should I clean or replace the filters?
Pre-filters should be rinsed with water every 1-2 months and completely dry before reuse. Replace filters every 2-3 months or as indicated on the LCD screen for optimal performance.
Can I switch between cleaning heads during cleaning?
Yes, the Dyson V15 Detect™ allows you to easily detach and attach different cleaner heads, enabling optimized cleaning for hard floors, carpets, or detailed spots.
What should I do if the vacuum isn’t turning on?
Verify the battery is fully charged, ensure the battery is properly connected, and check for any blockages or error messages on the LCD. If issues persist, contact Dyson support.
Are accessories like crevice tools compatible with other Dyson models?
The LANMU Crevice Tool is compatible with a wide range of Dyson cordless vacuums, including V15, V12, V11, V10, V9, V8, and V7 series. Always check compatibility before purchase.
Getting the Most from Your Dyson V15 Detect™
By following these setup steps and maintenance tips, you’ll ensure your Dyson V15 Detect™ Origin cordless vacuum performs at its best for years to come. Proper assembly, regular filter care, and accessory use make cleaning more efficient and less stressful. Enjoy effortless, deep cleaning across your entire home with confidence and ease.
Affiliate disclosure: As an Amazon Associate we earn from qualifying purchases. Prices and availability are accurate as of the time of publishing.
Halloween Picks
halloween
As an affiliate, we earn on qualifying purchases.