To avoid a dry time disaster, position your air movers strategically by spreading them out along walls and directing airflow toward moisture-heavy areas. Overlap their coverage to create continuous, efficient circulation that pushes dry air into all corners and behind furniture. Avoid clustering units and adjust angles for ideal coverage. This setup promotes even drying, cuts down your total drying time, and prevents lingering moisture. Keep exploring for expert tips on fine-tuning your layout for perfect results.
Key Takeaways
- Position air movers to create overlapping airflow patterns along walls and high-humidity zones for even moisture removal.
- Space units apart to maximize coverage and prevent dead spots, ensuring continuous circulation.
- Angle and elevate air movers to direct dry air toward moisture-prone areas and improve overall distribution.
- Regularly monitor airflow and humidity, reposition units as needed to eliminate stagnant zones.
- Use natural room features to guide airflow, optimizing placement for faster, more effective drying.

When setting up air movers for drying, proper layout is crucial to guarantee efficient moisture removal. Your goal is to maximize air flow efficiency so that every corner gets the attention it needs. To do that, you need to think carefully about equipment placement, positioning each air mover strategically to create a seamless flow of dry air across the affected area. Instead of randomly placing units, you should position them to work together, avoiding dead spots where moisture could linger. This involves understanding air flow dynamics and how to manipulate them for optimal drying. This means placing air movers at ideal angles and distances to promote even circulation, ensuring the air moves smoothly across surfaces and into spaces that tend to trap moisture.
Start by evaluating the space to identify high-humidity zones and areas prone to slow drying. You want to position your air movers so that they direct airflow toward these critical spots, not away from them. For example, in a room with walls and furniture, place units so that they push air along the length of the space rather than directly into obstacles. This increases air flow efficiency and prevents stagnation. You might also consider using multiple units in larger areas, spacing them evenly to create overlapping airflow patterns, which helps prevent moisture pockets from forming. The idea is to create a continuous, overlapping flow that covers the entire area without gaps.
Position air movers to push airflow along walls and furniture for efficient, even drying.
When setting up your equipment, keep in mind that the positioning of each air mover influences the overall drying time. Proper equipment placement ensures that dry air reaches every part of the space quickly and consistently. Avoid clustering units together; instead, spread them out enough to generate a broad, effective airflow. Use the natural shape of the room—placing units along walls or near moisture-prone areas can enhance the drying process. Adjust the angle of each air mover to direct airflow toward the most critical zones, and monitor the setup as you go to see if the air is circulating properly. If you notice stagnant areas, reposition the units accordingly.
Additionally, remember that the height at which you place air movers influences air flow. Elevating units slightly or angling them upward can help distribute airflow more evenly throughout the space. Regularly check the setup during the drying process, as furniture, materials, or humidity levels might require adjustments to maintain ideal air flow. Proper equipment placement and ongoing adjustments are key to avoiding prolonged drying times and ensuring a faster, more effective drying process. By focusing on air flow efficiency through strategic layout, you’ll greatly improve your drying results and minimize potential damage caused by moisture.
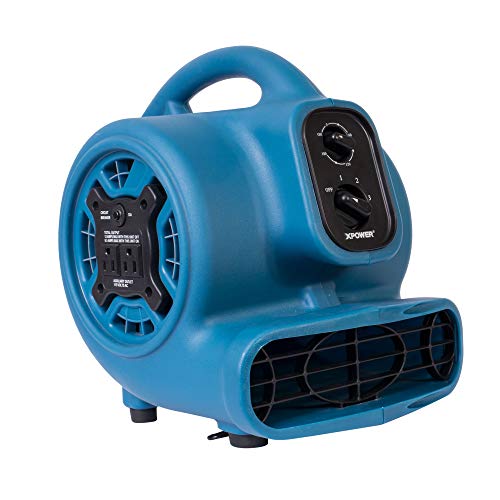
XPOWER P-230AT Mini Mighty 1/4 HP 925 CFM Centrifugal Air Mover, Carpet Dryer, Floor Fan, Blower, Stackable, Daisy Chain, for Water Damage Restoration, Janitorial, Plumbing, Home Use
- Fast Surface Drying: Dries carpets, floors, and furniture quickly
- Powerful & Energy-Efficient: 1/4 HP motor, 925 CFM, low energy use
- Long Power Cord & Daisy Chain: 10 ft cord, stackable design, daisy chain capable
As an affiliate, we earn on qualifying purchases.
As an affiliate, we earn on qualifying purchases.
Frequently Asked Questions
How Long Should Air Movers Run During the Drying Process?
You should run air movers for at least 24 to 48 hours during the drying process, depending on drying time factors like the extent of water damage and humidity levels. Proper air mover placement guarantees effective airflow, speeding up drying. Keep them running continuously or periodically as needed, monitoring moisture levels regularly. Adjust run times based on real-time conditions to prevent mold growth and ensure thorough drying.
Can Multiple Air Movers Be Used Simultaneously for Faster Drying?
Yes, you can use multiple air movers simultaneously to speed up drying, but you need to take into account air flow and power capacity. Ensure the air movers are strategically placed to maximize air circulation without creating turbulence or dead spots. Check your power capacity to prevent overloads. Proper layout and balancing airflow help achieve faster drying times while maintaining safe operation and avoiding equipment damage.
What Safety Precautions Are Necessary When Setting up Air Movers?
Like a knight preparing for battle, you need to prioritize safety when setting up air movers. Always guarantee electrical safety by inspecting cords and outlets for damage before plugging in. Wear personal protective equipment such as gloves and safety goggles to prevent injury. Keep air movers away from water or damp areas, and don’t overload circuits. These precautions help prevent accidents and ensure effective, safe drying.
How Do I Prevent Secondary Damage During Air Mover Operation?
To prevent secondary damage during air mover operation, you should focus on humidity control and proper equipment placement. Keep humidity levels balanced to avoid mold growth or further damage, and position the air movers strategically to ensure even drying without causing secondary damage. Regularly monitor moisture levels, and adjust the airflow direction as needed. Proper planning helps minimize risk and speeds up the drying process effectively.
Are There Specific Air Mover Brands Recommended for Optimal Drying?
Think of choosing air movers like picking the right compass for a journey. For ideal airflow, brands like XPOWER, Phoenix, and Vornado stand out for their durability and power. These brands deliver consistent, high-quality performance, ensuring faster drying times and minimized secondary damage. Investing in reliable equipment from these recommended brands helps you maintain control and efficiency, guiding your restoration efforts smoothly and confidently through any drying challenge.
Conclusion
By following an effective air mover layout, you can ensure dry times are cut down—sometimes up to 30% faster than random placement. Remember, proper positioning guarantees consistent airflow, which is key to avoiding mold and secondary damage. With the right setup, you’ll see faster results and happier clients. So, take the time to plan your layout carefully; it’s a small step that makes a big difference in drying efficiency and disaster recovery.