Choose a cordless stick vacuum that fits your floors, home size, and cleaning needs, then assemble and use it correctly. This guide is for first-time buyers and owners who want a dependable routine for hard floors, rugs, and everyday debris. Allow about 30-60 minutes to compare options, charge and set up the vacuum, and clean an area; routine upkeep usually takes 5-15 minutes.

Get cleaning gear delivered free with Prime
- Fast, free delivery on millions of items
- Prime Video, Amazon Music and more included
- Member-only deals all year

TechRise Cordless Stick Vacuum Cleaner, 55KPA 650W, 70-Min Runtime
- ✔ Motor: 650W brushless
- ✔ Stated suction: Up to 55KPA
- ✔ Runtime: Up to 70 minutes; low-suction conditions
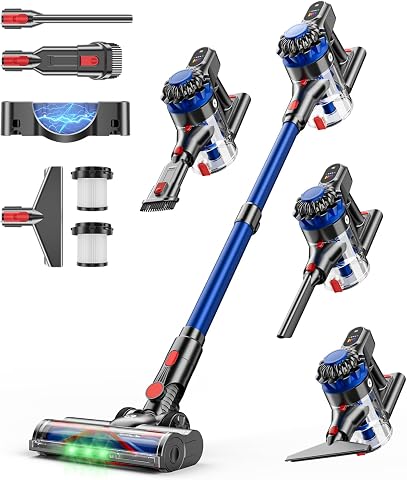
KARDV Cordless Vacuum Cleaner, 500W/40Kpa, 60-Min Runtime, LED Display, 8-in-1 Stick Vacuum
- ✔ Motor: 500W
- ✔ Stated suction: 40KPa
- ✔ Runtime: Up to 60 minutes MIN; 20–25 minutes MAX

Shark Pet Cordless Stick Vacuum IX141, Grey
- ✔ Model: IX141
- ✔ Vacuum type: Cordless stick with removable handheld unit
- ✔ Runtime: Up to 40 minutes; measured at handheld in standard mode
Difficulty: Beginner | Time: 30-60 minutes for setup and first use; 5-15 minutes for routine maintenance
What You’ll Need
Tools & Materials:
- A cordless stick vacuum with its charger and included attachments
- A clear area near an electrical outlet for charging
- Scissors or a seam ripper for removing wrapped hair, if needed
- A soft, dry cloth
Knowledge:
- Basic familiarity with your floor types and the areas you clean most
- Ability to follow the vacuum manufacturer’s assembly, charging, and maintenance instructions
Check the manufacturer’s manual for assembly, charging, filter washing, and brush-roll removal. Models differ, and washing a filter that must stay dry can damage it. If buying a vacuum, compare its weight, battery runtime, dustbin capacity, included tools, and suitability for your floor types. Treat advertised runtime as a maximum; higher suction settings and powered attachments often use more battery.
TechRise Cordless Stick Vacuum Cleaner, 55KPA 650W, 70-Min Runtime
The TechRise makes the most sense for buyers who want one cordless machine to cover several rooms and switch between floors and furniture. Its stated 55KPA suction and 650W brushless motor put it first on paper for cleaning power among these three, while the 1.8-liter dust cup is the largest listed. A larger cup can reduce interruptions during a longer session, especially in homes where crumbs and pet hair accumulate quickly.Its up-to-70-minute runtime is the longest claim here, but we should read it as a low-suction figure under ideal conditions. It does not establish how long the vacuum will run at its stronger settings. The four power levels at least give us options to adjust, and the 90°/180° swivel head and telescopic tube are useful for getting around furniture and adjusting the reach. Unlike the Shark, which emphasizes hands-free emptying and a named pet tool, TechRise highlights capacity and self-standing storage. The KARDV, meanwhile, provides a specific anti-tangle brush design and gives a more explicit runtime range in MAX mode.TechRise is the broadest paper fit for whole-home cleaning, but upkeep matters: its HEPA filter and brush roller need cleaning every one to two weeks to maintain suction. We would skip it if we want a cordless vacuum with a clearly stated high-power runtime or minimal routine cleaning.
Pros:
- Largest listed dust cup at 1.8 liters
- Four power levels and up to 55KPA stated suction
- Self-standing body and adjustable telescopic tube
- Converts to handheld mode and includes versatile attachments
Cons:
- Up-to-70-minute runtime applies to low suction and ideal conditions
- Filter and brush roller require cleaning every one to two weeks
- High-power runtime is not specified
Best for: Households seeking a high-capacity cordless stick with several power settings for mixed floors and above-floor cleaning.
Not ideal for: Buyers who need dependable long runtime at high suction or want to avoid frequent filter and brush maintenance.
Bottom line: TechRise leads this group for stated capacity and whole-home versatility, provided we accept the low-mode runtime qualification and regular upkeep.
“TechRise leads this group for stated capacity and whole-home versatility, provided we accept the low-mode runtime qualification and regular upkeep.”
KARDV Cordless Vacuum Cleaner, 500W/40Kpa, 60-Min Runtime, LED Display, 8-in-1 Stick Vacuum
KARDV is the more clearly specified middle ground. Its V-shaped anti-tangle floor brush addresses a familiar cordless-vacuum chore: removing wrapped hair from the roller. That makes it a particularly relevant option for homes with long hair or pets, although the supplied details do not say that the roller needs no cleaning. The rotatable, LED-equipped head should also help us spot and steer around debris under furniture.Its runtime description is unusually useful for comparison: up to 60 minutes on MIN mode, but about 20–25 minutes in MAX mode. That range tells us more about the cost of stronger suction than the TechRise’s single maximum claim does. The 1.5-liter cup sits between TechRise’s 1.8 liters and the Shark’s unspecified XL capacity, while the touchscreen and wall-mounted charger give KARDV a more organized home setup. Compared with Shark, it lists a sealed multi-layer filtration system and an eight-in-one accessory set; compared with TechRise, its stated suction is lower and it has fewer power levels.We would choose KARDV when hair management and clear mode expectations matter more than the highest stated suction or biggest bin. Its MAX-mode runtime is the main limitation for larger homes: those expecting to clean everything at full power on one charge may need to work in sections or use a lower setting where suitable.
Pros:
- V-shaped anti-tangle brush with LED headlights
- Runtime is specified for both MIN and MAX modes
- 1.5-liter dust cup and wall-mounted charging station
- Eight-in-one attachments support handheld cleaning
Cons:
- MAX-mode runtime is stated as 20–25 minutes
- Up-to-60-minute figure applies only to MIN mode
- Two speed settings offer less adjustment than TechRise’s four
Best for: Pet or long-hair households that want an anti-tangle brush, a large cup and clearly stated runtime by power mode.
Not ideal for: Buyers who expect to use maximum suction for a long whole-home session or want the largest listed dust cup.
Bottom line: KARDV is the most transparent choice for balancing hair handling and runtime, as long as we are comfortable reserving MAX mode for shorter jobs.
“KARDV is the most transparent choice for balancing hair handling and runtime, as long as we are comfortable reserving MAX mode for shorter jobs.”
Shark Pet Cordless Stick Vacuum IX141, Grey
The Shark IX141 is the practical pick for buyers who want a stick vacuum that readily becomes a handheld cleaner. Its removable handheld unit, Pet Multi-Tool and crevice tool make the transition from floors to upholstery, stairs or narrow spaces straightforward. That focused accessory setup is easier to assess than KARDV’s broader eight-in-one package, while the supplied description does not give Shark a comparable suction figure or multiple power-level details.For floor work, Shark combines HyperVelocity suction with a low-profile design and LED headlights. The headlight and clearance can help us find and reach debris under furniture, and the XL removable dust cup has a hands-free CleanTouch Dirt Ejector for emptying. Those convenience features distinguish it from TechRise, which offers a larger stated capacity and self-standing storage but calls for regular filter and brush cleaning. Shark lists up to 40 minutes of runtime, measured at the handheld vacuum in standard mode; we should not compare that directly with KARDV’s MIN-mode or TechRise’s low-suction whole-vacuum claims.We rank Shark third because its task flexibility is strong, but the product details leave more unanswered questions about filtration, battery swapping and runtime in stick mode. It suits buyers who value a familiar 2-in-1 approach and easier bin emptying. Those prioritizing the highest stated suction, longest runtime claim or most detailed filtration specs should look first at TechRise or KARDV.
Pros:
- Removable handheld vacuum for above-floor jobs
- Pet Multi-Tool and crevice tool are included
- XL cup with hands-free CleanTouch Dirt Ejector
- LED headlights and low-profile design aid under-furniture cleaning
Cons:
- Up-to-40-minute runtime is measured in handheld standard mode
- Runtime at maximum suction is not specified
- No HEPA filtration or swappable battery is listed in the supplied details
Best for: People who regularly clean floors plus stairs, furniture, cars or other above-floor areas and value convenient emptying.
Not ideal for: Buyers who need documented HEPA filtration, a stated swappable battery or clear runtime figures for stick-vacuum use.
Bottom line: Shark is the most convenient fit here for mixed floor and above-floor chores, but its supplied specs offer less performance and filtration detail than the other two.
“Shark is the most convenient fit here for mixed floor and above-floor chores, but its supplied specs offer less performance and filtration detail than the other two.”
As an Amazon Associate we earn from qualifying purchases.
Before You Start
Pick up cords, small toys, and objects that could jam the brush roll. Keep liquids, hot ash, and sharp debris out of the vacuum unless its manual explicitly permits them. Do not vacuum wet floors with a dry-use model. Charge the battery using the supplied charger and place the charging dock where the vacuum can stand securely without blocking a walkway.
Step-by-Step Instructions
Step 1: Match the vacuum to your home
List the surfaces you clean, such as hardwood, tile, low-pile rugs, or thick carpet. Decide whether you need a removable handheld unit for stairs, furniture, or a car. Compare the vacuum’s weight, stated runtime, dustbin capacity, charging time, available replacement filters, and included attachments. Check that the manufacturer identifies it as suitable for your main floor types.
For a small home with mostly hard floors, maneuverability and a crevice tool may matter more than a large bin. For carpet or frequent pet hair, look for a powered brush head and check how the brush roll is cleared of hair.
Tip: Read the manual or product specifications for runtime by power mode when available. A single maximum-runtime figure may reflect a low-power setting.
Check: You can explain why the vacuum and its included tools fit your main floors and cleaning routine.
Step 2: Assemble the vacuum and charging dock
Unpack the vacuum and compare its parts with the manual. Connect the wand, floor head, handle, and dustbin in the order shown; press each joint together until it locks. Attach the charging dock to a stable surface using the supplied hardware, or position its stand on level flooring if it is freestanding. Keep the dock away from heat and damp areas.
Tip: Do not force a connector that will not fit. Turn off the vacuum and check the part orientation and model-specific instructions.
Check: The vacuum stands or rests securely, attachments click into place, and the dock is stable.
Step 3: Charge the battery fully
Connect the supplied charger or place the vacuum on its dock as directed. Check that the charging indicator lights up, then allow the battery to charge for the time specified in the manual. Keep the charger and battery uncovered and away from moisture while charging.
Tip: If no indicator appears, reseat the vacuum or battery and check that the outlet works. Use only a charger approved for your model.
Check: The indicator shows a full charge or the manual’s stated completion signal.
Step 4: Prepare the room and choose an attachment
Remove loose objects, secure cables, and move fragile items out of the cleaning path. Use the floor head for open floor areas, a crevice tool for edges and narrow gaps, and an upholstery tool for furniture only when its instructions allow it. Select the floor or suction mode recommended for the surface.
Tip: On hard floors, a soft roller or hard-floor setting can help limit scattering. For rugs, check whether the manual recommends disabling a powered brush roll.
Check: The route is clear, and the chosen attachment and setting are suitable for the surface.
Step 5: Vacuum in steady, overlapping passes
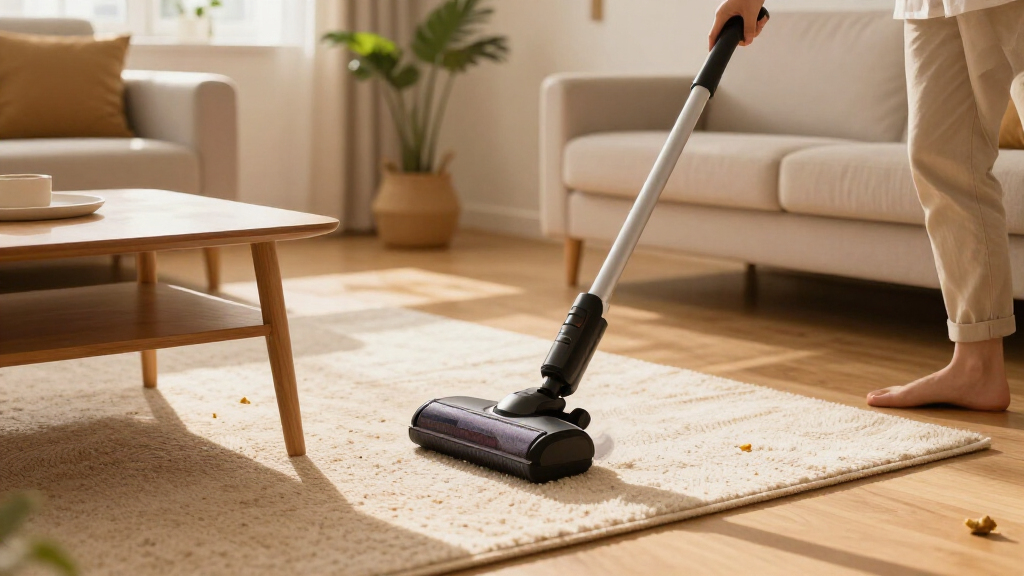
Turn the vacuum on and guide the head slowly across the floor. Overlap each pass slightly so narrow strips of debris are not left between them. Work from the far side of the room toward the exit, then use the appropriate attachment along edges and around furniture. Reduce the suction or change the brush setting if the head pulls strongly on a rug.
Watch the battery indicator as you work. If the vacuum has more than one power mode, use the lowest mode that lifts the debris; save high power for stubborn dirt or carpet when the manual permits it.
Tip: Avoid repeatedly running the head over cords, tassels, or long fabric. Stop and switch off the vacuum if an object catches in the brush roll.
Check: Visible debris is removed, the head moves without snagging, and the vacuum does not stop from an obstruction.
Step 6: Empty the dustbin after cleaning
Switch off the vacuum and detach or position the dustbin as the manual directs. Hold it over a rubbish bin and open its release mechanism. Keep your face away from the opening to avoid dust. Close the bin firmly, refit it, and check that it locks before storing the vacuum.
Tip: Empty the bin when it reaches the marked fill line or when suction drops. A packed bin can restrict airflow.
Check: The dustbin is empty, securely closed, and fully reattached.
Step 7: Check the brush roll and air path
Switch off the vacuum and disconnect it from the charger before inspecting it. Look for hair, thread, and larger debris wrapped around the brush roll or blocking an accessible air path. Remove buildup using the method described in the manual; use scissors only if the model’s instructions allow it and keep the cutting edge away from bristles and the belt.
Tip: Never put fingers near a powered brush roll. If the manual permits removing the roll, follow its release and refitting steps exactly.
Check: The brush roll turns freely by hand where accessible, and no visible obstruction remains.
Step 8: Clean the filter and store the vacuum
Check the manual and filter indicator for the cleaning schedule. Remove the filter only as instructed. Tap loose dust into a rubbish bin, or wash it only if the manufacturer says it is washable. Let a washed filter air-dry completely for the specified time before refitting it; never run the vacuum with a damp or missing filter.
Store the vacuum on its dock or in a stable, dry location. Keep attachments together and leave the battery within the storage and charging conditions listed in the manual.
Tip: Filters that appear similar may have different care requirements. Follow the instructions for your exact model.
Check: The filter is correctly seated and fully dry, the vacuum is off, and it is stored securely.
Common Mistakes to Avoid
- Buying based only on the advertised maximum runtime. — Compare runtime by power mode when available, and account for carpet, powered tools, and the size of the area you clean.
- Using the same brush setting on every surface. — Check the floor head instructions and change the brush or suction setting for rugs and hard floors.
- Running the vacuum with a wet, missing, or blocked filter. — Follow the model’s filter-care directions and let washable filters dry completely before reinstalling them.
- Ignoring hair buildup until the brush roll stops. — Inspect the brush roll regularly, especially after cleaning areas with long hair or pets.
Troubleshooting
Problem: The vacuum will not turn on after charging.
Solution: Check the charge indicator, reseat the battery if it is removable, and confirm that the dustbin and other safety-lock parts are fitted correctly. Consult the manual if the battery indicator reports a fault.
Problem: Suction is weak or debris remains on the floor.
Solution: Empty the dustbin, inspect the wand and floor head for blockages, and clean the filter as directed. Confirm that the selected mode suits the surface and that the filter is dry and correctly seated.
Problem: The brush roll stops or makes an unusual noise.
Solution: Switch the vacuum off and disconnect it from the charger. Remove caught hair or debris following the manual, then check that the roll is refitted correctly. Stop using it if the noise continues.
Problem: The battery runs out before the room is clean.
Solution: Charge it fully, use a lower mode where it still cleans effectively, and clean or replace a clogged filter according to the manual. For a large home, divide cleaning into sections or check whether a compatible spare battery is available.
What Success Looks Like
The vacuum is fully charged, assembled securely, and suited to the surfaces you cleaned. Floors are visibly clear of loose debris, the dustbin is closed, the brush roll and air path have no obvious blockage, and the filter is dry and correctly installed. The vacuum powers on normally and can be stored safely on its dock or in a stable location.
Next Steps
After each use, empty the bin when needed and remove visible hair from the brush roll with the vacuum switched off. Check the filter and other parts on the schedule in the manual, and replace worn filters or batteries with compatible parts. If suction remains weak after clearing blockages and cleaning the filter, stop using the vacuum and contact the manufacturer or a qualified repair service.
Frequently Asked Questions
How long should a cordless stick vacuum run on one charge?
Runtime depends on the model, battery condition, suction mode, and attachment. Powered brush heads and high-power modes usually use more charge. Check the product specifications for mode-specific figures and plan around your usual cleaning area.
Can I use a cordless stick vacuum on hardwood floors?
Use it if the manufacturer lists hard floors as a suitable surface. Choose the recommended setting or soft roller when available, and avoid a brush configuration that scatters debris or risks scratching the floor.
How often should I clean the filter?
Follow the schedule and indicator for your model. Dust levels, pets, and frequent use can increase how often the filter needs attention. Replace it when the manufacturer recommends or when cleaning does not restore airflow.
Can I vacuum up liquids?
Do not vacuum liquids with a standard dry-use stick vacuum. Moisture can damage the motor or filter. Use a wet-dry model specifically designed for liquids and follow its instructions.
Why does the vacuum lose suction even with a charged battery?
A full dustbin, clogged filter, blocked wand, or debris in the floor head can restrict airflow. Switch the vacuum off, inspect these parts, and clean them according to the manual before using it again.
Fall Picks
fall essentials
As an affiliate, we earn on qualifying purchases.