To clean your dryer lint trap, remove the screen after each load and clear lint with your fingers or a soft brush, making sure not to rinse it. For the duct, unplug the dryer and disconnect the vent, then use a flexible brush to scrub the interior and a vacuum to suck out any loose lint. Check exterior vents for obstructions. Following these steps helps improve safety and efficiency—keep going to discover more expert tips.
Key Takeaways
- Remove and clean the lint trap after every load using fingers or a soft brush, avoiding washing to prevent moisture retention.
- Disconnect the dryer from power and detach the duct from the back before cleaning.
- Use a flexible vent brush to scrub inside the duct, then vacuum out loosened lint and debris.
- Check exterior vents for blockages like leaves or nests, and clear obstructions for proper airflow.
- Schedule professional or deep cleaning every 6-12 months to maintain safety, efficiency, and prevent fire hazards.
Regularly cleaning your dryer’s lint trap and duct is essential for safe and efficient operation. Over time, lint buildup can accumulate in the trap and duct, which not only reduces your dryer’s efficiency but also poses a fire hazard. When lint lines the interior of the duct, it restricts airflow, making your dryer work harder and longer to dry clothes. This extra strain can lead to higher energy bills and increased wear on your appliance. By maintaining a clean lint trap and duct, you help guarantee your dryer runs smoothly and safely, saving you money and preventing potential fires.
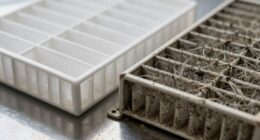
Start by removing the lint from the trap after every load. Pull out the lint screen and clear away all the accumulated lint with your fingers or a soft brush. Avoid washing or rinsing the lint screen with water, as moisture can cause lint to stick and reduce airflow. Once cleaned, replace the screen securely to keep it functioning properly. Regularly inspecting and cleaning this trap prevents lint buildup from becoming overwhelming, which in turn keeps your dryer operating at peak dryer efficiency.
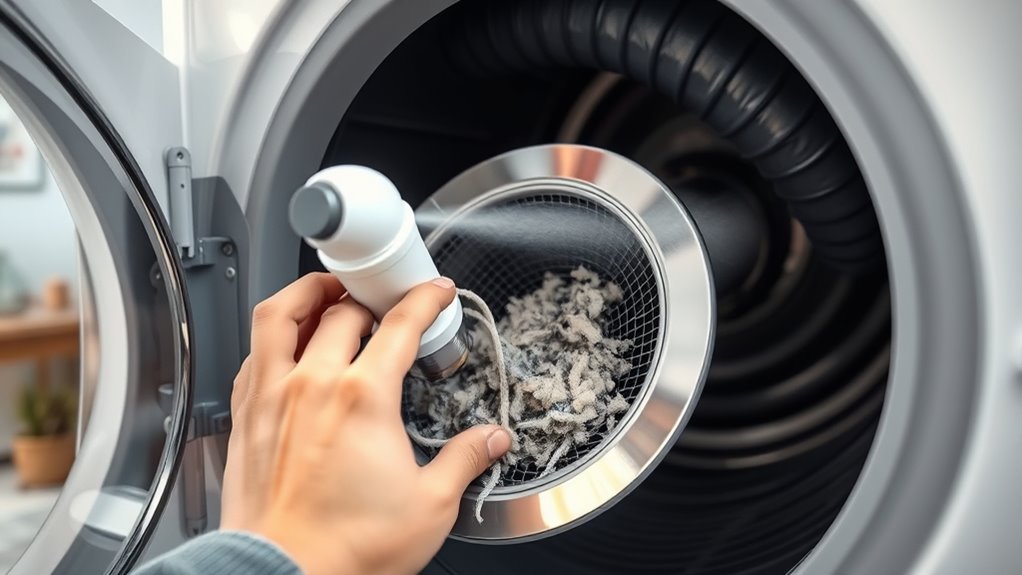
Next, focus on your dryer duct, which can gather considerable lint over time, especially if you notice your drying times increasing. Disconnect the duct from the back of your dryer, making sure the appliance is unplugged first. Use a dryer vent cleaning brush—long and flexible—to scrub the interior of the duct thoroughly. Insert it into the duct and rotate it to dislodge lint, then pull it out to remove accumulated debris. For more thorough cleaning, you can also use a vacuum cleaner with a hose attachment to suck out loosened lint and dust. Be cautious to remove all lint and debris because even small amounts can restrict airflow. Proper maintenance of the duct significantly reduces fire risk and enhances dryer performance.
If your duct passage is particularly long or complex, consider using a vent cleaning system or hiring a professional for a deep clean. Regular maintenance every six to twelve months will markedly reduce lint buildup, which improves dryer efficiency and minimizes fire risk. Remember, a clean duct allows hot, moist air to escape freely, reducing drying times and energy consumption. It’s also wise to check the exterior vent for blockages like leaves or bird nests, ensuring unobstructed airflow.

Holikme 3 Pcs Dryer Vent Cleaner Kit, 304 Stainless Steel Replacement Lint Brush for Clothes Dryer Vent Trap, Cleaning Brush & Flexible Crevice Tool
- Set Includes: Vent duct brush, lint trap brush, crevice tool
- Durable Stainless Steel Bristles: Anti-rust, flexible, dense bristles for stubborn lint
- Ergonomic Handle: Comfortable wood grip for easy control
As an affiliate, we earn on qualifying purchases.
As an affiliate, we earn on qualifying purchases.
Frequently Asked Questions
How Often Should I Replace My Dryer Vent Hose?
You should replace your dryer vent hose every 3 to 5 years to guarantee proper vent maintenance and prevent fire hazards. Over time, the hose can become cracked, clogged, or damaged, reducing airflow and increasing safety risks. Regular inspection helps you spot signs of wear, but duct replacement is essential when you notice significant damage or persistent lint buildup. Staying on top of these updates keeps your dryer running efficiently and safely.
Can I Use Commercial Cleaners to Remove Lint Buildup?
Back in the day, folks relied on simple tools, but now you can’t just use any commercial cleaners or chemical solutions for lint buildup. These products may damage your dryer or vent system. Instead, opt for safe, natural methods like manual removal and regular cleaning. If you choose to use cleaners, make sure they’re specifically designed for dryer vents, and always follow the manufacturer’s instructions to avoid hazards.
What Are the Signs of a Clogged Dryer Vent?
You might notice your dryer takes longer to dry clothes or overheats, which are signs of a clogged vent. You may also feel a burning smell or see lint around the dryer area. Ignoring these signs poses a fire hazard and can reduce indoor air quality. Regularly inspecting and cleaning your dryer vent helps prevent these risks, keeping your home safe and your indoor air healthier.
Is It Safe to Clean the Dryer Duct With a Vacuum?
Think of cleaning your dryer duct like tending a garden—regular care keeps it healthy. Using a vacuum for duct maintenance can be safe if you follow proper vacuum safety protocols, ensuring the vacuum is designed for such use and that you avoid damaging the duct. However, be cautious about potential fire hazards or static buildup. When in doubt, consult a professional to prevent any mishaps and keep your dryer running efficiently.
How Can I Prevent Lint Buildup in the Future?
To prevent lint buildup in the future, you should practice regular lint prevention and dryer maintenance. Clean your lint trap after every load, and check the duct for obstructions at least once a year. Use a brush or vacuum designed for dryer ducts to clear out accumulated lint. Also, avoid overloading your dryer, which can cause lint to cling and block airflow, ensuring your appliance runs efficiently and safely.
Conclusion
Cleaning your dryer lint trap and duct keeps your appliance running efficiently, reduces fire risks, and saves you money. Regularly clean the lint trap to improve airflow, and check the duct for blockages to prevent overheating. Stay proactive, stay safe, and enjoy a dryer that works better and lasts longer. Keep up with these simple maintenance steps, and you’ll enjoy peace of mind, better performance, and a safer home every time you do.