To clean around toilet hinges without guessing, start by turning off the water supply and draining the tank to prevent messes. Remove the toilet seat for better access and use a small brush or old toothbrush to scrub detailed areas and remove buildup. Wipe surfaces regularly for hygiene. To keep hinges functional, apply a small amount of silicone spray or light mineral oil, then move the seat to spread the lubricant evenly. For more precise steps, keep exploring how to maintain your toilet effectively.
Key Takeaways
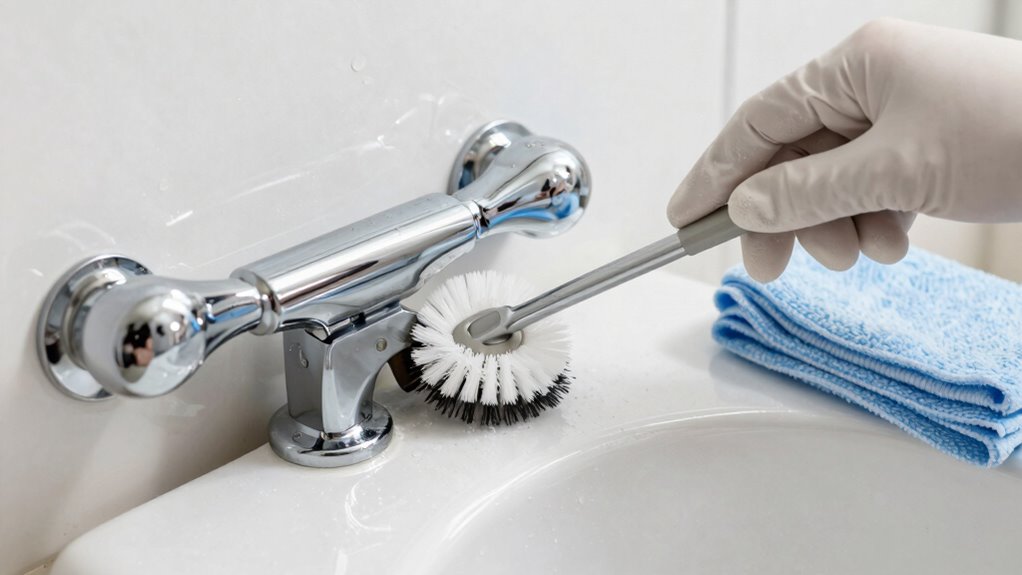
- Use a small, pointed brush or old toothbrush to reach tight hinge areas effectively.
- Apply a gentle cleaning solution or vinegar to loosen grime before scrubbing.
- Remove the toilet seat to access hinges fully and clean thoroughly.
- Lubricate hinges with a silicone spray to prevent dirt buildup and squeaking.
- Wipe away excess lubricant and flush multiple times to clear residual debris.
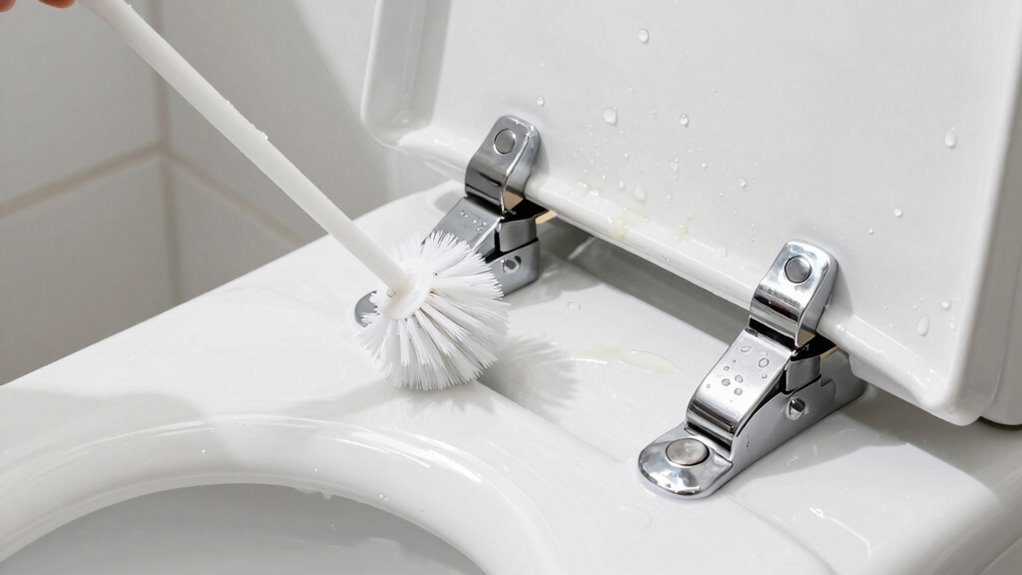
Start by turning off the water supply to your toilet and draining the tank to prevent spills. Remove the toilet seat if possible, as this allows you to access the hinges more easily. Use a brush or cloth to wipe away surface debris, but don’t forget to get into the nooks and crannies where dirt tends to accumulate. A small, pointed brush or an old toothbrush can be effective for scrubbing around the hinges without damaging the components. This step is essential, as buildup can lead to corrosion or loosen parts over time.
Once you’ve cleaned the visible areas, focus on hinge lubrication. Regular hinge lubrication helps prevent squeaking and keeps the moving parts functioning smoothly. Use a silicone-based spray or a light mineral oil, applying it sparingly to the hinge joints. Avoid heavy grease or oil that could attract dirt or cause buildup. After applying the lubricant, move the toilet seat back and forth to ensure the lubricant spreads evenly across the hinges. This process minimizes wear and tear, extends the lifespan of the hinges, and makes future cleaning easier. Incorporating cleaning tools into your routine can also make maintenance more effective and less time-consuming. Regular maintenance of these toilet components can also prevent the development of unpleasant odors caused by bacteria buildup. Additionally, understanding the material composition of your hinges can help choose the most suitable cleaning method and lubricant. Knowing proper maintenance techniques is crucial for avoiding damage and ensuring long-term functionality. Moreover, staying informed about recommended cleaning practices can further prolong the life of your toilet hinges.
When you’re done, wipe away any excess lubricant and reattach the toilet seat if you removed it. Turn the water supply back on and flush a few times to flush out any residual debris or excess lubricant. Regular maintenance of the hinges not only keeps your toilet looking good but also prevents potential leaks or damage that can result from neglect. Incorporating hinge lubrication into your routine guarantees the hinges stay functional and quiet, while thorough cleaning prevents bacterial buildup.

6Pcs Hard Bristle Crevice Cleaning Brush, Multifunctional Premium Crevice Cleaning Tool, Designed for Cleaning Narrow Spaces, Suitable for Toilet, Faucets,Kitchen,Grout, KOSPRIE
MULTIFUNCTIONAL CREVICE CLEANING TOOLS:This hard bristle crevice cleaning brush is specially designed to handle narrow spaces and corners,…
As an affiliate, we earn on qualifying purchases.
As an affiliate, we earn on qualifying purchases.
Frequently Asked Questions
What Tools Are Best for Cleaning Tight Hinge Areas?
You should use a small, angled brush or a toothbrush to clean tight hinge areas effectively. These tools help reach into narrow spaces and remove dirt or buildup. After cleaning, consider applying hinge lubrication to keep parts moving smoothly. If screws are loose, tighten them with a screwdriver to prevent further issues. Using these tools and techniques guarantees thorough cleaning and maintains the hinges’ functionality.
How Often Should I Clean Around Toilet Hinges?
You should clean around toilet hinges at least once every three to six months. Regular cleaning helps maintain toilet hinge lubrication, preventing squeaks and ensuring smooth operation. It also aids in hinge corrosion prevention by removing dirt and moisture buildup. Use gentle cleaning tools and avoid harsh chemicals, especially around the hinges, to protect the metal parts and keep your toilet functioning properly over time.
Can I Use Bleach Around Toilet Hinges?
Yes, you can use bleach around toilet hinges, but do so carefully to prevent damage and mold growth. Bleach helps with mold prevention and disinfects, but avoid harsh or excessive use that might degrade the sealant application over time. After cleaning, make certain the area dries thoroughly. Regular cleaning with mild solutions and proper sealing maintains hygiene and prevents mold buildup around the hinges, keeping your toilet area fresh and clean.
What Are Signs of Hinge Damage Needing Replacement?
You’ll notice signs of hinge damage when the toilet seat becomes loose, wobbles, or makes squeaking noises. During damage inspection, check for rust, corrosion, or cracks around the hinges. If lubrication doesn’t fix the looseness or noise, it’s likely time for replacement. Persistent sticking or visible damage indicates the hinges are compromised, and replacing them guarantees your toilet stays secure and functions properly.
Are There Eco-Friendly Cleaning Options for Toilet Hinges?
Cleaning around toilet hinges is like tending a delicate garden—you want to be gentle and effective. You can opt for eco-friendly alternatives like vinegar and baking soda, which act as natural cleaning solutions. These options are safe for the environment and your family, providing a powerful clean without harsh chemicals. Regular use of natural cleaning solutions keeps your toilet hinges fresh and extends their lifespan, all while protecting the planet.

WD-40 Specialist Silicone Lubricant with SMART STRAW SPRAYS 2 WAYS, 11 OZ
Use on a variety of surfaces – metal, rubber, vinyl, plastic and more. Use on 100s of items…
As an affiliate, we earn on qualifying purchases.
As an affiliate, we earn on qualifying purchases.
Conclusion
Now that you know the secret to cleaning around those tricky toilet hinges, imagine the satisfaction of a spotless bathroom. But wait—there’s one last step that could make all the difference. Are you ready to uncover it? Keep your tools close and your curiosity piqued—you might just discover a quick trick that keeps your toilet sparkling longer than you ever thought possible. The best part? It’s easier than you think.

Lumkew 40Pcs Disposable Crevice Cleaning Brushes for Small Spaces, Detail Gaps Scrub Cleaner Brush Set for Toilet Bowl Corner, Household Cleaning Tool Supplies for Window Track, Door Grooves, Vent Fan
Reaching Narrow Corners: One of the big tough problems with cleaning toilets is getting into all the toilet's…
As an affiliate, we earn on qualifying purchases.
As an affiliate, we earn on qualifying purchases.

Fluidmaster K-400H-039 High Performance Toilet Fill Valve with 2-Inch Adjustable Toilet Flapper Kit
The PerforMAX fill valve and 2 in. Flapper Kit is the premium solution to make your 2 in….
As an affiliate, we earn on qualifying purchases.
As an affiliate, we earn on qualifying purchases.