To install a suction pool cleaner, start by gathering your tools and turning off your pool pump. Connect the hose securely to the cleaner, ensuring tight fittings and proper length. Prime the hose and cleaner assembly by submerging them in water to remove air bubbles. Attach the hose to either the skimmer or a dedicated suction port, then position the cleaner properly and turn the pump back on. For detailed steps, keep going to learn more.
Key Takeaways
- Turn off the pool pump and gather all necessary tools and fittings before starting installation.
- Connect the hose securely to the cleaner and prime it by filling with water in the pool to remove air.
- Attach the hose to the appropriate pool port (skimmer or dedicated suction) ensuring tight, leak-free connections.
- Secure all fittings, check for leaks underwater, and tighten or replace damaged parts as needed.
- Gently lower the cleaner into the pool, position it correctly, turn on the pump, and verify proper operation.

Poolmaster Manual Pool Vacuum Hose, 30 Ft x 1-1/2” for Inground & Above Ground Pools, Not for Automatic Cleaners, Kink-Free, Heavy Duty Pool Cleaner Hose with Swivel Cuff – Made in USA
- Intended Use: Manual pool cleaning only
- Kink Resistance: Kink-free swivel cuff prevents tangles
- Material: Flexible, UV- and chemical-resistant EVA
As an affiliate, we earn on qualifying purchases.
As an affiliate, we earn on qualifying purchases.
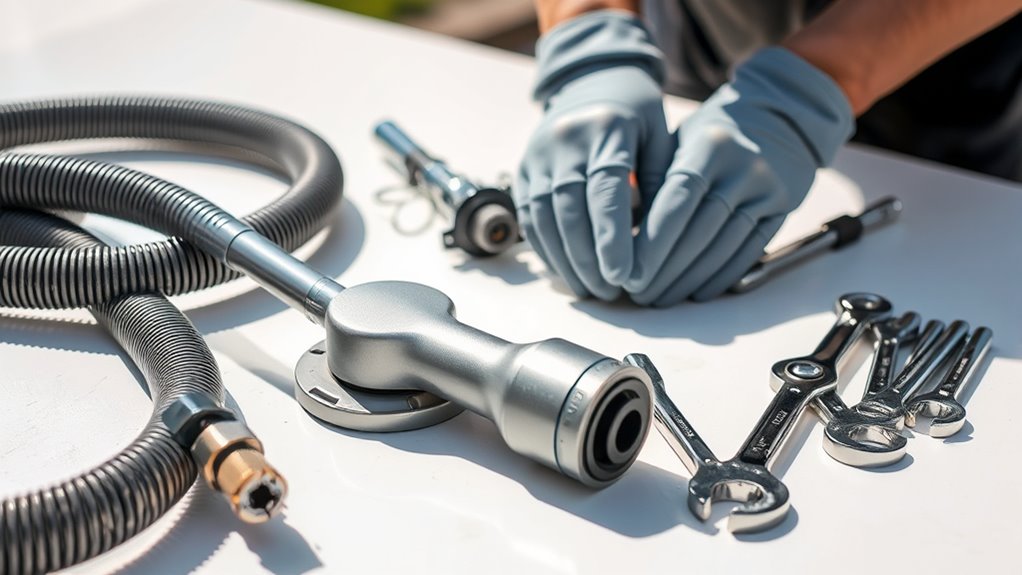
Gather Your Tools and Equipment
Before you begin installing your suction pool cleaner, it’s essential to gather all the necessary tools and equipment. Proper preparation guarantees your pool maintenance goes smoothly and keeps your cleaning schedule on track. You’ll need a telescopic pole, hose, and the cleaner itself. Check if you require any adapters or fittings specific to your pool type. Having a clean, organized workspace helps prevent missing parts or delays. Make sure your pool is free of debris and clear of obstructions for easier installation. Keep in mind that a well-maintained pool with a consistent cleaning schedule minimizes dirt buildup and reduces the effort needed later. Gathering everything beforehand saves time and keeps you focused, making the entire installation process more efficient and less stressful. Additionally, understanding the importance of projector technology can help you appreciate the value of proper setup and maintenance. Recognizing how advanced algorithms enhance device performance underscores the significance of a thorough installation process. Being aware of divorcing a partner with Borderline highlights the importance of careful planning and clear communication during complex projects. Moreover, consulting detailed instructions can further ensure a smooth setup process and reduce potential troubleshooting. Including sound therapy techniques can also help maintain patience and focus during the installation process, especially if challenges arise.
Turn Off the Pool Pump

Turning off the pool pump is a crucial step to guarantee a safe and effective installation of your suction pool cleaner. During pool maintenance, operating the pump while installing the cleaner can cause water flow issues or injury. Before starting, confirm the pump is completely turned off to prevent accidental activation. This safety precaution protects you from potential hazards and ensures the cleaner attaches correctly without water pressure interfering. Additionally, turning off the pump allows you to work calmly and accurately, avoiding water spray or debris being drawn into the system. Always double-check that the pump is off before handling hoses or components. Taking this simple step helps maintain your pool’s safety, prolongs equipment life, and makes installation smoother. Properly managing financial aspects related to pool equipment can also prevent unexpected expenses during maintenance or repairs.
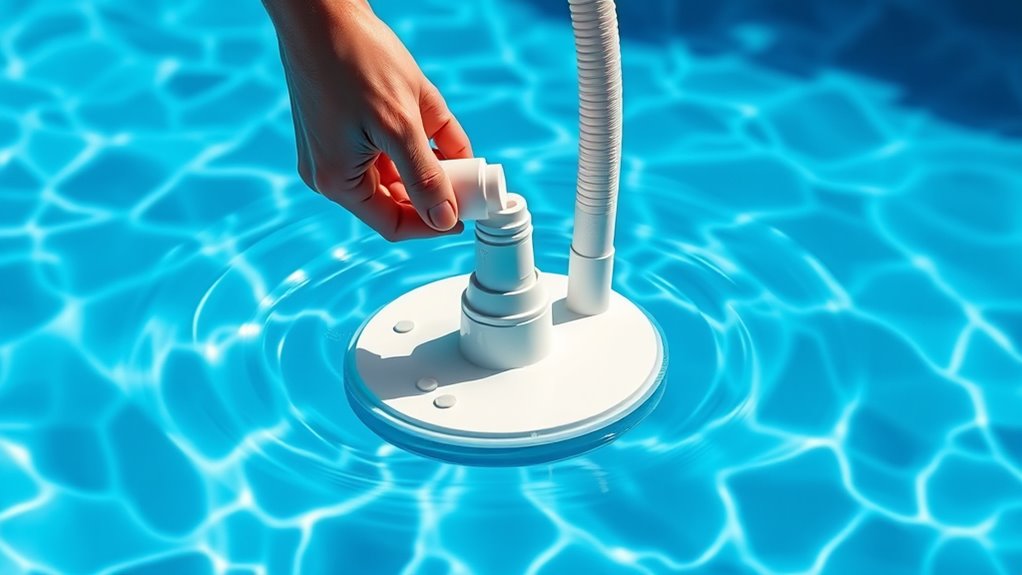
Connect the Hose to the Cleaner
First, choose the right hose size to match your cleaner model. Then, attach the hose securely to the cleaner, making sure all connections are tight. Double-check that everything is firmly connected so the cleaner works efficiently. Additionally, ensure that your safety precautions are in place to prevent burns or accidents during operation. For optimal performance, verify that your tuning modifications are compatible with your pool cleaner system. Proper maintenance and understanding of fatherhood principles can also help ensure your pool cleaning system functions smoothly, especially when considering the effectiveness of maintenance routines for your equipment. Regularly reviewing your instruction manual can provide valuable tips for achieving the best results.
Select Appropriate Hose Size
Choosing the right hose size is essential for your suction pool cleaner to work efficiently. A properly sized hose ensures maximum flow and prevents issues like tangling or loss of suction. When selecting a hose, consider the following:
- Hose flexibility: Choose a hose that’s flexible enough to maneuver easily around your pool without kinking.
- Hose length: Make sure the hose is long enough to reach all areas of your pool comfortably without excess slack.
- Diameter: Match the hose diameter to your cleaner’s specifications for maximum suction power and efficiency.
- Proper installation is also crucial to ensure optimal performance and prevent leaks or disconnections during cleaning.
Getting the right size helps maintain proper water flow, reduces strain on the pump, and makes cleaning more effective. Take your time to measure and select the best options for your pool’s size and setup.
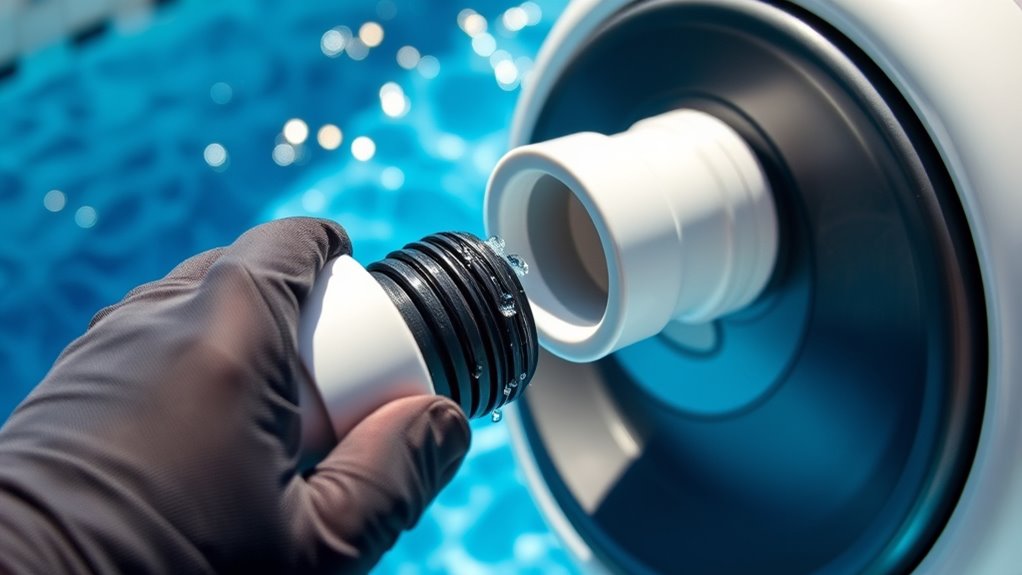
Attach Hose to Cleaner Properly
To guarantee your suction pool cleaner functions properly, you need to attach the hose securely to the cleaner. First, ensure the hose length matches your pool’s size and setup, so the cleaner can reach all areas without strain. When connecting, check the connector types; some cleaners use slip fittings, while others require screw-on or locking connectors. Firmly attach the hose to the cleaner’s inlet, making sure it’s tight enough to prevent leaks but not overtightened. Proper attachment prevents disconnections during operation, which could reduce cleaning efficiency. Also, verify that the hose is aligned correctly to avoid kinks or twists. Taking this step seriously ensures your cleaner operates smoothly and covers the entire pool surface effectively. Additionally, inspecting the connection points regularly can help maintain optimal performance and prevent potential issues. Regular maintenance and checking for wear and tear can extend the lifespan of your pool cleaning system. Moreover, ensuring the hoses and connectors are compatible with your specific cleaner model can prevent unnecessary frustrations during setup. Properly sealing connection points is essential to maintain maximum suction and cleaning effectiveness.
Ensure Secure Connections
Ensuring the hose is securely connected to the cleaner is essential for effective operation. Proper attachment prevents leaks and loss of suction, ensuring the cleaner works efficiently. Check that the connection fittings are tightly secured and compatible with your hose material to avoid disconnections. To ensure a secure fit:
- Verify the connection fittings match your hose material for a snug fit.
- Tighten all fittings firmly, but avoid overtightening which could damage them.
- Regularly inspect for cracks or wear that might compromise the seal.
- Proper planning and installation considerations can help avoid costly errors and maximize benefits. Additionally, understanding the shelf life of components can help ensure replacements are available when needed. Making sure these connections are tight and compatible helps maintain consistent suction, extending the cleaner’s lifespan and keeping your pool spotless. Properly secured hoses reduce hassle and ensure your pool cleaner performs at its best. Regular maintenance and inspections can help identify issues before they lead to system failures or reduced efficiency. Staying aware of the local water conditions can also prevent buildup that might affect the hose connection and overall cleaning performance.
Prime the Hose and Cleaner Assembly

Before attaching the hose and cleaner to your pool, it’s important to prime the system to create the necessary suction. To do this, submerge the hose and cleaner in the pool water, allowing them to fill completely and expel any air pockets. This step is vital for effective pool maintenance, as air in the system can hinder proper suction. Avoid adding pool chemicals during this process, as they can interfere with the priming. Once submerged, keep the hose submerged and hold the ends under water until no more air bubbles escape. This ensures the entire assembly is filled with water, helping your pool cleaner operate efficiently. Proper priming promotes better cleaning and extends the lifespan of your suction pool cleaner. Additionally, understanding how automation technologies are improving efficiency can help you better maintain your pool cleaning system.
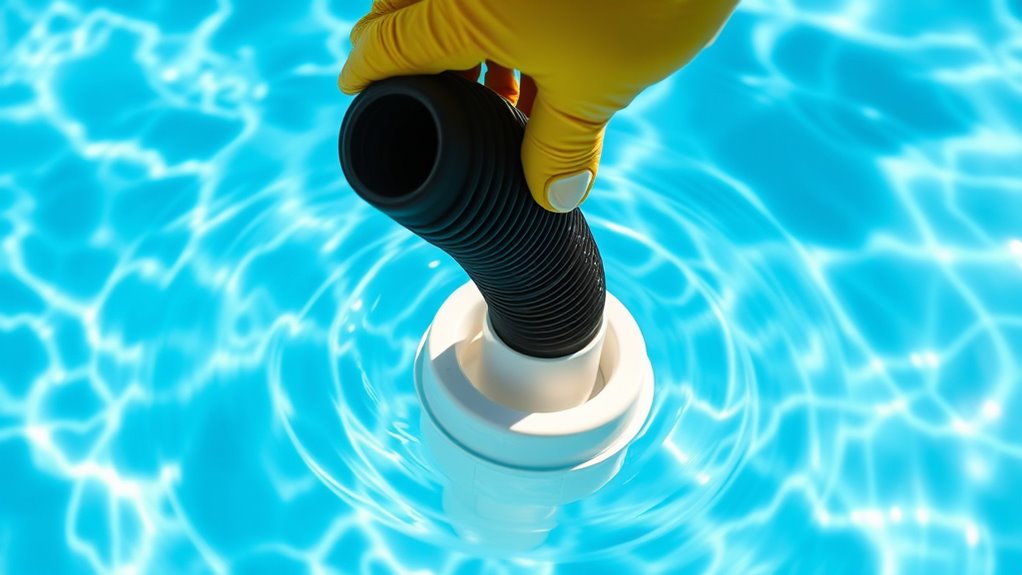
Attach the Hose to the Skimmer or Suction Port
First, choose the correct port to guarantee proper suction. Then, connect the hose securely to prevent leaks or disconnections. Additionally, double-check for leaks around the connection to keep your cleaner working efficiently. Ensuring all connections are tight can help prevent environmental impact that may arise from system vulnerabilities. Incorporating self-watering plant pots can also help in maintaining consistent connections and reducing potential issues over time.
Select Appropriate Port
Choosing the right port to attach your hose is essential for effective cleaning. Your pool’s skimmer or dedicated suction port can be used, but each has pros and cons. If you connect to the skimmer, ensure it has an automatic shutoff feature to prevent damage when the cleaner is not in use. The suction port often provides stronger, more consistent power, ideal for thorough cleaning. Consider whether your cleaner has a manual override, allowing you to switch between automatic shutoff and manual control if needed.
- Use the skimmer for easier access, but check for automatic shutoff compatibility
- Opt for the suction port when you need more power and control
- Confirm the port supports your cleaner’s features, including manual override options
Connect Hose Securely
To guarantee your suction pool cleaner operates effectively, you need to connect the hose securely to the skimmer or suction port. Start by ensuring the hose length is appropriate—too long can cause tangles, while too short might limit movement. Use a hose with good flexibility so you can easily maneuver it into position without kinks. Attach the hose firmly to the skimmer or suction port, making sure the connection is tight to prevent air leaks that could reduce suction power. Check that each section of the hose is securely connected and straight, avoiding twists or bends that could obstruct water flow. Properly securing the hose helps maintain consistent suction, ensuring your cleaner covers the pool surface efficiently.
Check for Leaks
How can you guarantee your hose connection isn’t causing a loss of suction? Start with leak detection by inspecting all connections for cracks or loose fittings. To ensure a proper seal, check these areas:
- Securely attach the hose to the skimmer or suction port, tightening fittings as needed.
- Submerge the hose and fittings in water to spot bubbles indicating leaks.
- Replace or repair damaged hoses or fittings using appropriate repair methods, like replacing cracked sections or sealing leaks with waterproof tape.
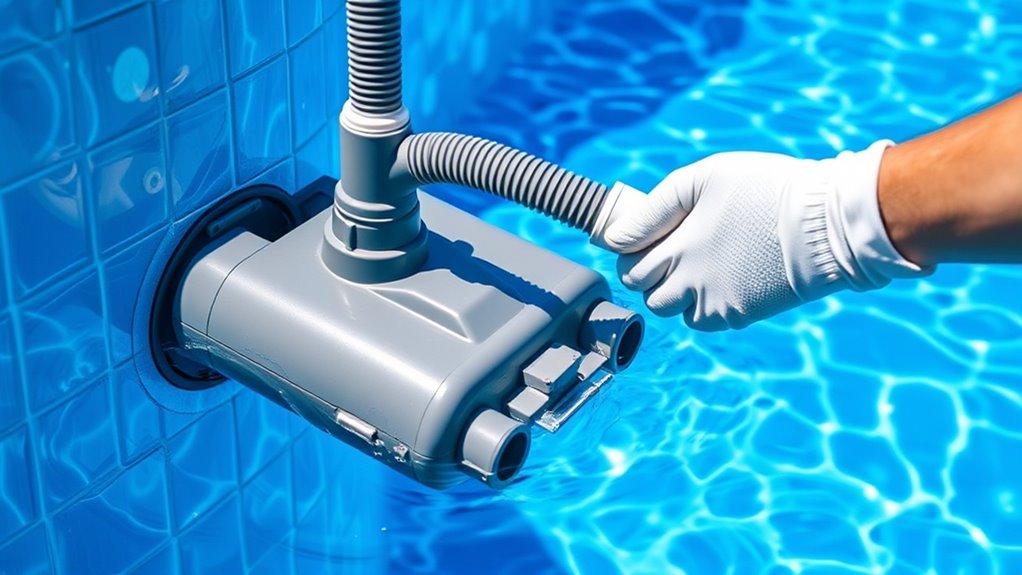
Submerge and Position the Cleaner in the Pool
Once you have prepared the cleaner and the hose, gently submerge the unit into the pool, ensuring it remains upright. To submerge properly, hold the cleaner by its handle and slowly lower it into the water, avoiding sudden drops that could cause damage. As it sinks, make sure it stays upright so it doesn’t tip over or get stuck. Once submerged, carefully position the cleaner so the intake opening faces the pool surface or debris area you want to target. This helps it cover the pool efficiently. Confirm that the hose is straight and free of kinks, allowing smooth movement. Proper submersion and accurate positioning are key for excellent operation and effective cleaning. Take your time to ensure the cleaner is set correctly before moving on.
Turn On the Pump and Test the Cleaner’s Operation
After guaranteeing the cleaner is properly submerged and positioned, turn on the pool pump to activate the suction. This begins the pump operation, powering the cleaner and allowing it to start moving across the pool surface. During cleaner testing, observe how the cleaner moves and cleans the pool floor. Make sure it’s not stuck or skipping over areas. Check for any signs of improper operation, such as unusual noises or lack of movement. To assure everything runs smoothly:
- Watch for the cleaner’s movement and coverage
- Confirm the suction hose is securely attached
- Listen for any irregular sounds during pump operation
If the cleaner isn’t functioning correctly, pause the pump, recheck connections, and adjust the cleaner’s position. Proper testing guarantees maximum cleaning performance.
Frequently Asked Questions
How Often Should I Clean or Replace My Pool Cleaner’S Filter?
You should perform regular filter maintenance to keep your pool cleaner working efficiently. Check the filter weekly, especially after heavy use or storms, and clean it when it appears dirty. For the replacement schedule, most filters need replacing every 1 to 2 years, but this varies with usage and water quality. Proper filter maintenance ensures peak cleaning performance and prolongs the life of your pool cleaner.
Can I Use a Suction Pool Cleaner in Saltwater Pools?
You wonder if a suction pool cleaner is compatible with saltwater pools. The good news is, many models are saltwater compatible, but you should always check the manufacturer’s guidelines for your specific cleaner. Regular maintenance is essential; rinse the cleaner after use, inspect for corrosion, and follow a proper maintenance schedule. By doing so, you’ll guarantee your cleaner functions efficiently and lasts longer in your saltwater pool.
What Safety Precautions Should I Take During Installation?
During installation, you should prioritize safety by ensuring electrical safety and proper chemical handling. Always turn off power before working with electrical components to prevent shocks. Handle pool chemicals carefully, avoiding spills or splashes. Use insulated tools and wear protective gear. Keep the area dry and well-ventilated. Follow manufacturer instructions closely, and if unsure, consult a professional. Your safety is essential for a smooth and safe installation process.
How Do I Troubleshoot if the Cleaner Is Not Moving Properly?
If your pool cleaner isn’t moving properly, start troubleshooting by checking for hose tangling, which can hinder movement. Guarantee the hose is straight and free of knots. Next, verify sensor calibration if your cleaner has sensors; improper calibration can affect navigation. Also, clean any debris blocking the intakes or sensors. Regularly inspecting these areas helps keep your cleaner functioning smoothly and prevents frustrating movement issues.
Is It Necessary to Remove the Cleaner After Each Use?
You don’t need to remove the suction pool cleaner after every use, but proper storage and regular maintenance are key. When you’re done, rinse it thoroughly and check for debris or wear. Store it in a cool, dry place to prevent damage. Regularly inspect hoses and brushes to keep it working efficiently. This way, your cleaner stays in good shape and continues to clean your pool effectively.
Conclusion
Now, with your pool gleaming and the cleaner silently gliding beneath the surface, you’ve transformed a cluttered mess into a tranquil oasis. As the water ripples gently around the sleek, humming device, you realize that a simple tool can turn chaos into calm. The pool, once a tangled web of dirt and debris, now mirrors the clear sky above—calm, pristine, and inviting. Sometimes, the quiet work beneath the surface creates the most peaceful retreat.